

Thursday, December 10, 2015
Masks, 5th Grade
Thursday, November 5, 2015
Portraits, 5th Grade


Overall, I think these turned out great.

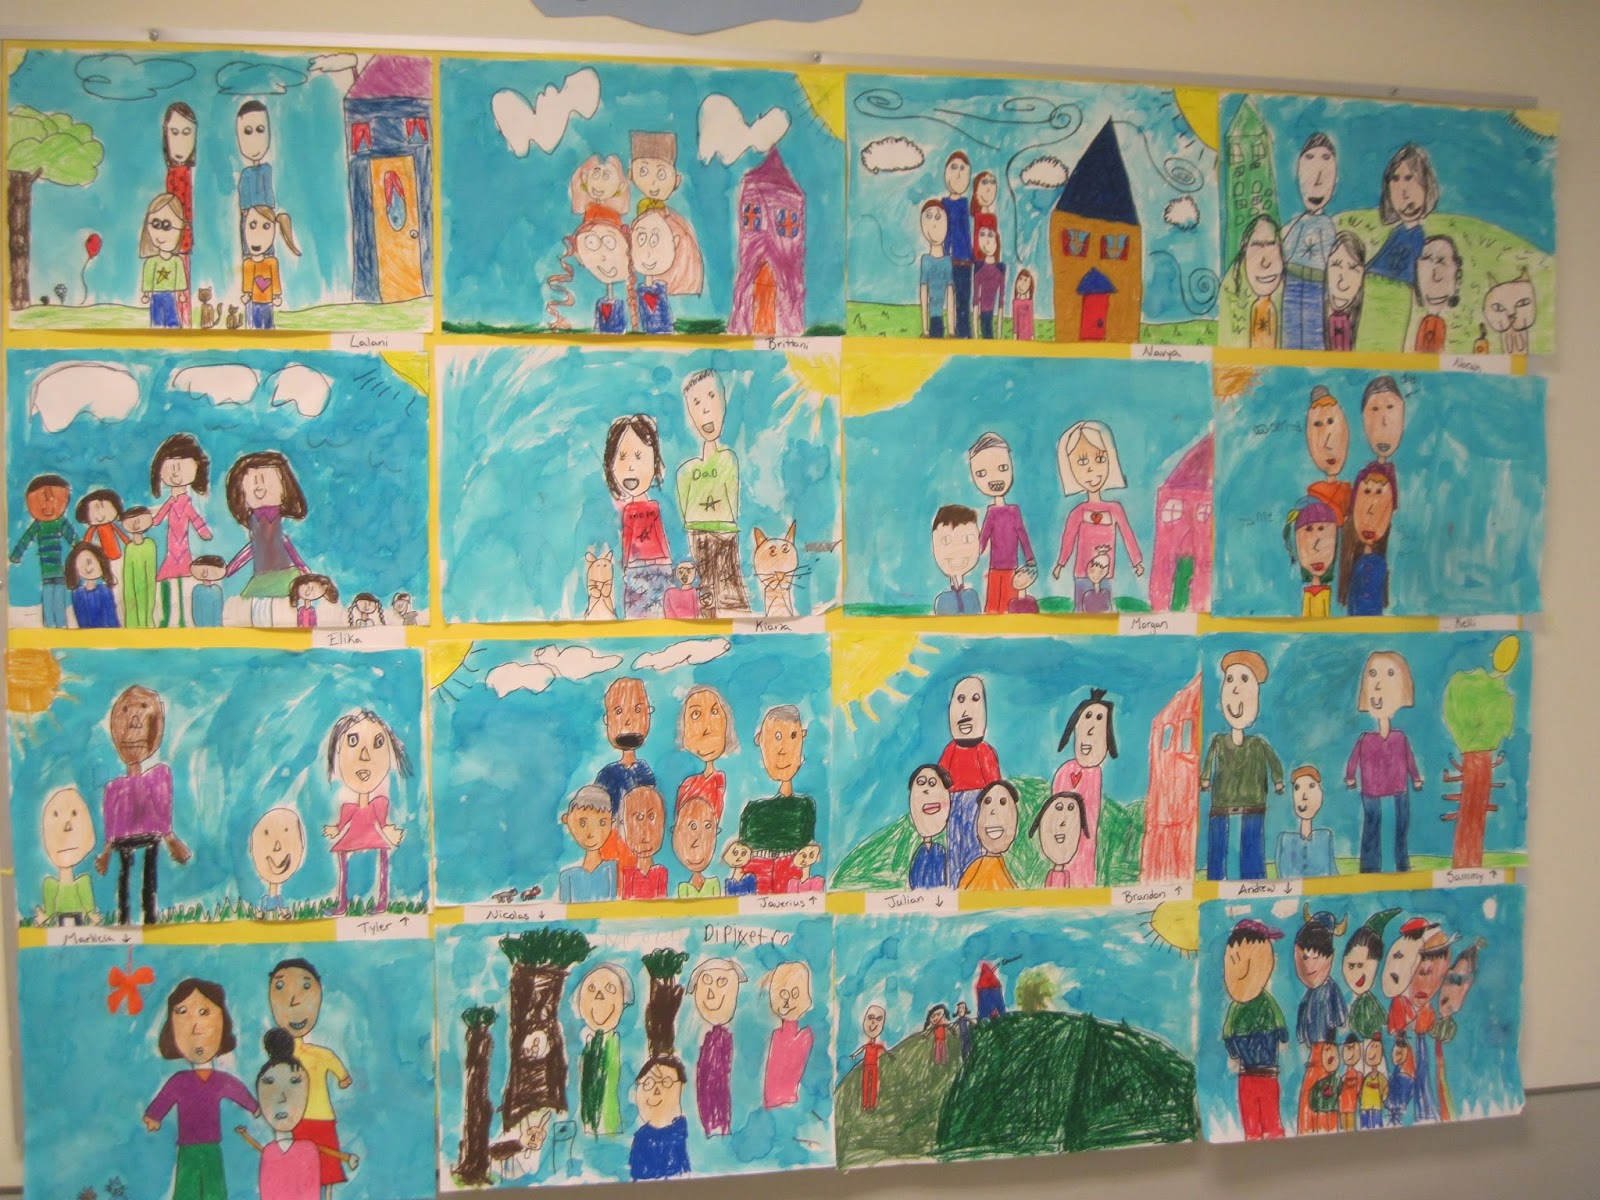
Monday, November 2, 2015
Family Portraits, 2nd Grade


Thursday, October 22, 2015
My Two Sides, 4th Grade
I have been trying to teach differently this year. Instead of focusing solely on skill based art lessons, I am now attempting to take a more meaningful approach to teaching art. This year my lessons will be focusing on the theme, My Place in This World. The idea is to have students create art that relate directly to their life, their experiences, their feelings, and their world.
 My fourth graders spent about a month working on these paintings. In this lesson, students created a self portrait that shows both who they are on the outside, and how they feel on the inside. In order to understand the meaning behind their art, I am having all 2nd through 5th graders write artist statements about their work.
 I really like these, and my students are very proud of their creations. I am still learning to loosen up my teaching style, and allow for more creativity, but I think this was a good start to this years theme.


Monday, August 24, 2015
School Starts Tomorrow


Tuesday, August 11, 2015
Summer at Boston University
I have been working on a Master's degree through Boston University. Most of the classes are online. However, this summer, I went to Boston to take a few studio courses. I took two classes: Wire Sculpture and Printmaking. All of these techniques were wonderful to learn, however in order to apply them to my elementary classroom, I will need to simplify the techniques and materials.
 This is the wire sculpture I created during my time at Boston. This was a very time consuming process because it involved twisting and bending thick sharp wire. If I were to do this with my elementary students, I would need to use softer wire.
 We created a variety of monoprints during my time in Boston. This monoprint was created with water-soluble crayons on plexiglass, which was then printed on wet paper. This process can also be done with oil paints or watercolors. While I don't have a press in my elementary classroom, I would be able to do a version of this by simply rubbing with a spoon.
 This was a woodcut I created. The colors were added by printing several times using stencils to block out the parts I didn't want inked. While woodcutting would be inappropriate for my elementary classroom, a similar process could be done with styrofoam or E-Z cut.


This last one was a pronto print. It was created by printing a photo on pronto paper using a laser jet printer. Then I used a brayer, and added ink directly to the pronto paper. Next, I used a wet sponge and wiped the pronto paper. It was printed using a press. I am not sure if this is doable for my elementary students. I will have to see if this process works without a press first.
Tuesday, May 5, 2015
Paper Mache Totem Poles, 5th Grade

to art class. He also was kind enough to stay in the art room and assist during the art lesson. This was very helpful, as paper mache is difficult to pull off in short 30 minute classes.

This totem pole lesson took us 5 (30 minute) art classes to complete. Students began with an oatmeal container and used cardboard, bottle caps, and paper towel rolls to create an animal. Once this was created, students covered the entire thing with paper mache. Lastly, students painted their creation.

Friday, April 24, 2015
Art Show 2015
This was our first Art Show. I decided to turn our art show into a fundraiser. We had a company called Artome frame the artwork, and we sold each frame for $25.

 Other than the framed artwork, we also had sculptures up for everyone to see.
 Here are our 4th grade paper mache ice cream cones.
 These flowers were made by my kindergarten and fifth graders. They worked collaboratively on this.
 The Totem Poles were made by my fifth graders. Each student created one piece of the totem, and put them together to make a large totem pole.
By using this company, the whole process was really easy. I labeled the artwork, and sent it to Artome two weeks prior to the show. They came on the day of the show with the framed artwork, and even hung the artwork for me. At the end of the show they packed up any unsold frames, and will send the artwork back to me. This was great because it made cleanup easy, and we are only charged for what is sold.
Thursday, March 19, 2015
Musical Art, 1st grade


Monday, March 16, 2015
Reflections, 3rd Grade

This is a great lesson to teach reflections. I found the idea for this lesson on the blog, Fine Lines. Basically, all you have to do is have students draw and color the top half of their paper with regular washable markers. Then students spray water on the bottom half of their paper. After this, students fold their paper and rub. This makes a simple easy print of the image.

I allowed my students to draw any landscape image. Some students drew houses, while other drew castles, mountains, or farms.

This is a great example of art that connects to math. This one is easy enough to be done by either the art teacher or the classroom teacher.
Tuesday, February 17, 2015
Cakes, 5th Grade


Friday, February 13, 2015
What's in your brain?, 3rd Grade


Subscribe to:
Posts (Atom)